플러터로 제작한 윈도우 앱을 Inno Setup 을 사용해서 설치 실행 파일로 만들때 내용을 정리해 본다.
Inno Setup 은 처음 시작할때는 "New.." 버튼을 눌러서 Wizard 기능을 이용해서 설치할 실행 파일을 선택하는 화면이 나오고 필요한 리소스까지 다 선택할 수 있는데, 매 선택화면에서 이거다 싶은거를 입력하고 나서 setup 실행 파일을 만들고 나서 직접 설치해보면 의도랑 안 맞는게 나올수 있다. 그렇다고 매번 Wizard 기능을 사용할 수도 없다. 생성한 setup 스크립트 파일인 .iss 로 어떻게 다시 Wizard 로 나오게 하는지 잘 모르겠더라.
- 실행 파일 및 필요한 리소스 포함

- "flutter build windows --release" 배포용 실행 파일 생성

: 실행 파일은 pdf_gen.exe 이지만 flutter_windows.dll 파일과 data/ 폴더가 없으면 실행이 안된다. 반드시 셋업 파일에 포함시켜야 함.
- 스크립트 내용을 분석해서 필요한 부분만 잘 수정해보자. 보다보면 감이 온다.
; Script generated by the Inno Setup Script Wizard.
; SEE THE DOCUMENTATION FOR DETAILS ON CREATING INNO SETUP SCRIPT FILES!

#define MyAppName "PDF Generator"
#define MyAppVersion "1.0"
#define MyAppPublisher "Boos Company"
#define MyAppURL "firstboos.tistory.com"
#define MyAppExeName "pdf_gen.exe"
#define MyAppAssocName MyAppName + " File"
#define MyAppAssocExt ".myp"
#define MyAppAssocKey StringChange(MyAppAssocName, " ", "") + MyAppAssocExt

[Setup]
; NOTE: The value of AppId uniquely identifies this application. Do not use the same AppId value in installers for other applications.
; (To generate a new GUID, click Tools | Generate GUID inside the IDE.)
AppId={{A24F6EEF-1370-4951-A01A-BA317DBCA92C}
AppName={#MyAppName}
AppVersion={#MyAppVersion}
;AppVerName={#MyAppName} {#MyAppVersion}
AppPublisher={#MyAppPublisher}
AppPublisherURL={#MyAppURL}
AppSupportURL={#MyAppURL}
AppUpdatesURL={#MyAppURL}
DefaultDirName={autopf}\{#MyAppName}
UninstallDisplayIcon={app}\{#MyAppExeName}
; "ArchitecturesAllowed=x64compatible" specifies that Setup cannot run
; on anything but x64 and Windows 11 on Arm.
ArchitecturesAllowed=x64compatible
; "ArchitecturesInstallIn64BitMode=x64compatible" requests that the
; install be done in "64-bit mode" on x64 or Windows 11 on Arm,
; meaning it should use the native 64-bit Program Files directory and
; the 64-bit view of the registry.
ArchitecturesInstallIn64BitMode=x64compatible
ChangesAssociations=yes
DisableProgramGroupPage=yes
; Uncomment the following line to run in non administrative install mode (install for current user only).
;PrivilegesRequired=lowest
OutputDir=D:\MyWork\setup-output
OutputBaseFilename=pdf-gen_installer
SolidCompression=yes
WizardStyle=modern

[Languages]
Name: "english"; MessagesFile: "compiler:Default.isl"
Name: "korean"; MessagesFile: "compiler:Languages\Korean.isl"

[Tasks]
Name: "desktopicon"; Description: "{cm:CreateDesktopIcon}"; GroupDescription: "{cm:AdditionalIcons}"; Flags: unchecked

[Files]
Source: "D:\MyWork\setup\pdf_gen\{#MyAppExeName}"; DestDir: "{app}"; Flags: ignoreversion
Source: "D:\MyWork\setup\pdf_gen\flutter_windows.dll"; DestDir: "{app}"; Flags: ignoreversion
Source: "D:\MyWork\FLUTTER\pdf_gen\build\windows\x64\runner\Release\*"; DestDir: "{app}"; Flags: ignoreversion recursesubdirs createallsubdirs
; NOTE: Don't use "Flags: ignoreversion" on any shared system files

[Registry]
Root: HKA; Subkey: "Software\Classes\{#MyAppAssocExt}\OpenWithProgids"; ValueType: string; ValueName: "{#MyAppAssocKey}"; ValueData: ""; Flags: uninsdeletevalue
Root: HKA; Subkey: "Software\Classes\{#MyAppAssocKey}"; ValueType: string; ValueName: ""; ValueData: "{#MyAppAssocName}"; Flags: uninsdeletekey
Root: HKA; Subkey: "Software\Classes\{#MyAppAssocKey}\DefaultIcon"; ValueType: string; ValueName: ""; ValueData: "{app}\{#MyAppExeName},0"
Root: HKA; Subkey: "Software\Classes\{#MyAppAssocKey}\shell\open\command"; ValueType: string; ValueName: ""; ValueData: """{app}\{#MyAppExeName}"" ""%1"""

[Icons]
Name: "{autoprograms}\{#MyAppName}"; Filename: "{app}\{#MyAppExeName}"
Name: "{autodesktop}\{#MyAppName}"; Filename: "{app}\{#MyAppExeName}"; Tasks: desktopicon

[Run]
Filename: "{app}\{#MyAppExeName}"; Description: "{cm:LaunchProgram,{#StringChange(MyAppName, '&', '&&')}}"; Flags: nowait postinstall skipifsilent
- app icon 변경 방법
1. 아이콘 파일을 준비
: 무료 이미지 png 파일을 찾거나 아이콘에 사용할 png 를 구하고, png 를 ico 파일 포맷으로 변환하는 온라인 사이트(https://cloudconvert.com/png-to-ico) 를 이용하여 아이콘 파일(.ico)을 구한다.
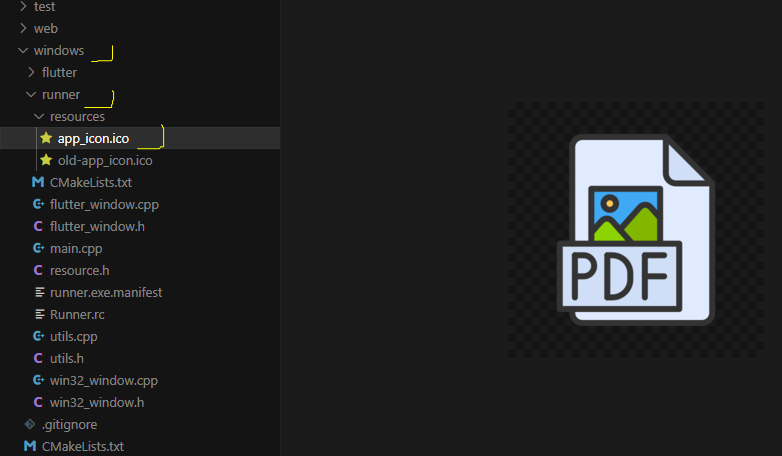
2. 플러터로 생성했던 프로젝트 디렉토리의 windows/runner/resources/ 에 있는 app_icon.ico 파일을 교체한다.

'Engineering > Flutter' 카테고리의 다른 글
| Your project's Gradle version is incompatible with the Java version that Flutter is using for Gradle on flutter Ladybug (0) | 2025.01.13 |
|---|---|
| 플러터 main.dart 간단 코드 (0) | 2023.07.06 |